Showing posts with label pink. Show all posts

Monday, November 24, 2014

DIY Monkey Canvas

Hello again!
 
I just realized I haven't posted anything since November 4th. Sorry! I'm not dead, just busy with school and preparing for finals next week!
 
I have tons of posts to get caught up on and I've finally started working on the honey one I've been promising you for forever! I would have done that one first, but I just had to post this one because it seems like everyone I know is having babies and this is the perfect personalized baby shower gift!
 
I made this canvas for some of our friends who had a little girl and they absolutely loved it!
 

What you need:
  • Canvas (I used 18x24" from Wal Mart)
  • A sponge brush (I got this one from Michaels)
  • Acrylic paints (I got mine from Wal Mart and Michaels and used: White, Green, a Baby Blue, Brown a Light Pink, Black, and Red)
  • Paint brushes of different sizes (I got mine from Wal Mart)
  • A plate for mixing paints
  • Some plain white printer paper
  • Scotch tape (Or you can improvise with duct tape like me)
  • A Pencil


Step 1. Take whichever color you want to use as a background and pain the entire front of the canvas with this. I used my light pink for this step.


Step 2. While waiting for this paint to dry, start sketching out your monkey (Or whatever animal you choose).
 
You can always print something and trace it, I just googled cartoon monkeys and free handed this one.


As you can see, I had to tape two pieces of paper together to finish my monkey, which wasn't a big deal, other than the fact that we had no Scotch tape, so I improvised!


Step 3. Now paint the sides of the canvas with your background color. I find that the easiest way to do this is by lifting it up like I am doing below.


Step 4. Now, paint the general outline of your vine. This doesn't have to be perfect, so don't worry about super clean lines!


Step 5. Take your drawing and scribble all over the back with your pencil, making sure to cover all spots where there are lines drawn.


Step 6. Now, place the back side of your drawing (the one you just scribbled on) onto the canvas however you want to arrange it. With a dull pencil, press down firmly (but not too firmly) and trace over all of the lines.
 
You should have something like this:
(Sorry about the terrible picture, but the lines were so faint it was hard to get a good shot)


Step 7. Now outline all of the darker body parts with your brown, basically, leave out the hands, feet, and facial area.


Step 8. Fill what you just outlined in with a slightly larger brush.


Step 9. Now, mix a couple of drops of white paint in with your brown to create a lighter brown for the hands, feet, stomach, and face.


Step 10. Fill those areas in.
Don't be too worried about the color, though. I honestly hated this color when I was first painting it, but I figured there was no turning back so I left it. I'm actually glad I left it because it looks much better now that it has dried!


Step 11. Mix your pink with a few small drops of red to make the color for the ears.


Step 12. Fill the ears in.


Step 13. Fill your eyes in with white then add the black for the pupil.


Step 14. If you're adding a name, you can either print the letters and transfer them like you did the monkey, or you can freehand them, which is what I chose to do.


Step 15. Fill your letters in and let dry!
 

My little sister was hanging out with me when I was painting and she wanted to paint on my drawing of the monkey, so I decided to take some pictures to share with you all!
 
We were both exhausted because I was doing this at 10 at night and didn't finish until like midnight, but we had a great time!
 
If you have kids, this would be a fun thing for them to do while you work on painting the canvas!


Here is her finished product! (She hung it up on the fridge after this for my mom to see in the morning!)


Let me know what you guys think!

Don't forget to post your recreations to #countryclassdiy

Follow me on Tumblr

Shop my avon site: www.youravon.com/dmalloy


Thursday, August 7, 2014

DIY Gel Manicure and Breast Cancer Glitter Gradient

Good Morning Everyone!
 
I'm super excited to share this DIY gel manicure/glitter gradient with you all! I actually told all of my Facebook friends/Instagram followers I would post this yesterday, but I decided to make chex mix and ran out of time (oops).
 
Back to the point, this is a super easy manicure and from the research I've done, it can last anywhere from 7-14 days. Yay! Mine has been on for almost 2 days, so I can't tell you if that's true, but I'll be writing another post once I take the manicure off with daily pictures for you all!
 
My inspiration for this manicure cam from Pinterest, of course. Here is the post that inspired me to give this a try. If this actually lives up to the standards I'm holding it to, it's a great option for someone who doesn't have the money or time to sit at a nail salon (like me). The main tool you need is Gelous Nail Gel made by American Classics. It's $5.99, but you can get it for $5.39 with a Sally's card here.
 
When I was researching doing this manicure, I only saw plain colors, nothing of any interest to me. So I decided to do a design and see how it worked, not too hard. Well, it was one of those days where I literally could not decide on a color of nail polish, let alone a design. So, I called on my lovely Facebook friends and one of them suggested doing a solid color base with glitter french tips. This got my brain going and I came up with the design below:


Now, you might ask, why add the breast cancer ribbon? As some of you may know, my grandma and my aunt are both battling breast cancer and I am very close to them. I even went so far as to get a breast cancer ribbon tattooed on my wrist. So I guess you could say that I'm a bit partial to things with breast cancer ribbons on them. Plus, I just purchased this cute glitter nail polish from Maybelline's Color Show line that has some light pink sparkles mixed in with the gold, perfect way to incorporate the breast cancer ribbon!
 
What you need:
  •  American Classics Gelous Nail Gel (Link above)
  •  A Quick dry top coat (I used Seche Vite, which I also got at Sally's)
  • Pink Nail polish (I used LA Colors Pink-A-Boo)
  •  Glitter nail polish ( I used Maybelline Color Show Gilded Rose)
  •  Pink detailing nail polish or a detailing nail brush
A side note, you don't need a dotting tool. I'm not sure why I put it in the picture. 
 
 
Step 1. Paint 1 coat of Gelous on clean, dry nails. Make sure all the coats you paint are thin.


Step 2. Once this coat is dry, paint a thin coat of your polish on you nails. I did My glitter on my ring finger then painted the rest of the nails pink.


Step 3. Once that coat is dry, paint another coat of gelous on top.


Step 4. Once that coat is dry, paint another coat of your colored polishes.


Step 5. Take your brush from the glitter polish and wipe a good amount of the polish off. Paint about 2/3 down your nail or halfway, whichever you prefer. Leave the glitter nail alone at this point.


Step 6. Once that dries, take the glitter brush again and paint the top portion of your nail with a bit more glitter.
 
Step 7. Take your detailing brush and paint a ribbon on your accent nail. This was a bit tricky for me, but I eventually just did a hook shape for one side then added the line for the other side.


Step 8. Once that coat is dry, paint your top coat on.
 
**Side note, I absolutely love this Seche Vite topcoat and I will probably write a blog post comparing it to Essie's All-in-One**


Step 9. Add one last coat of Gelous.


And once that dries, clean your nails up and you're done!


Keep an eye out for my blog post about how long this manicure will last!

I am behind on my blogging and still have some pedicures that I have yet to post, as well as DIY Rice Packs, but I had to share this with you all!

I will also be making a canvas for my friend's baby tonight, so that will be up soon as well!

Post recreations to: #countryclassdiy

Follow me on Pinterest

If you have any ideas or questions, please feel free to comment or email me!


Thursday, July 24, 2014

Pink Gradient Canvas

Hello everyone!
 
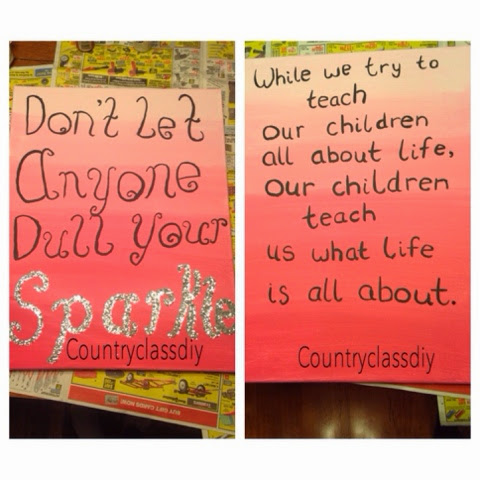
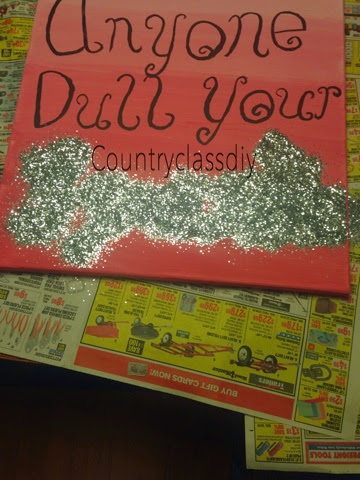
I'm super excited to share this tutorial with you all because it's so fun and cute! A couple of weeks ago, we celebrated the birthday of one of the girls that works in my office. She's super fun and quirky, so I voolunteered to make some awesome canvases for her! After some recon work and talking with her daughter, we found out that her favorite color is pink, hence the pink gradient! (It looks kind of red in the pictures.) This is a super easy project and probably took me about an hour and a half to two hours to do 2 of them!
 
Here are my finished canvases. You can obviously choose any color and saying you want.


What you need:
  •  Canvas (I always get mine at Walmart because it's the best deal. I used 14x18)
  •  Glitter (I also got this at Walmart)
  •  Paint brushes (have varying sizes on hand)
  •  A large sponge brush
  •  Red acryllic paint (Or a color of your choice)
  •  White acryllic paint (You need this to create the gradient look)
  •  Black acryllic paint (Or whatever color you want your words to be)
  •  Mod Podge (I have the matte kind)
  •  A plate for mixing paint colors
  •  Something to cover your table with (I use newspaper)
  •  
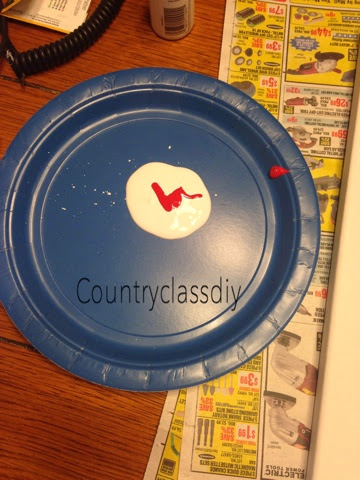
HEre's a close up of the acryllic paint I used

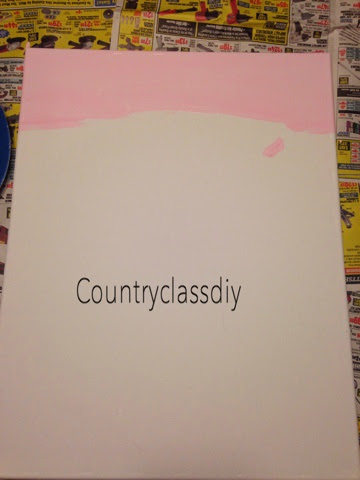
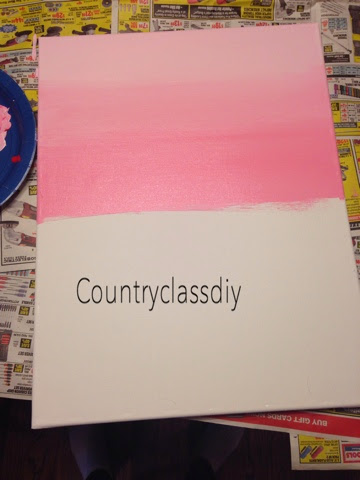
Step 1. Put a large amount of white paint on your plate. Then place a few small drops of your colored paint in the middle. I would do no more than 2. Mix this up with your sponge brush.


Step 2. After the paint is mixed well, paint a thick line across the top of your canvas. I'd tell you how thick, but I'm terrible with measurements, so just eyeball it. It doesn't have to be perfect because you will be blending with other colors. If you are doing 2 canvases, do all of the gradient painting steps at the same time. So once you're done with the light color on one, go right to the other.

As you can see, I accidentally got paint in the wrong spot.

Something else I want to point out, It's okay to get it on the sides, actually, it's better, because then you don't have to worry about any white edges showing. We'll paint the edges later anyways!


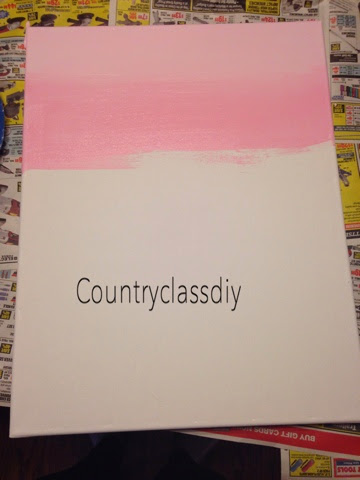
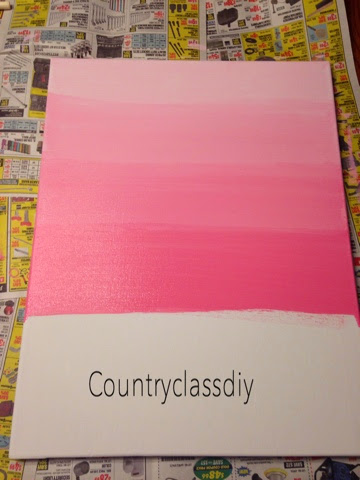
Step 3. Now add another drop or two of your colored paint to the white. You might have to add more white as well, and in this case, just add extra color.

Step 4. Paint another thick line with this mixture, slightly overlapping your first line. Remember, it doesn't have to be perfect!

You don't want the part that's overlapping to be a perfectly solid line, you want it to look like it's fading!


Step 5. Add a few more drops of your colored paint and mix (remember, you can always add more white as well).

Step 6. Paint a third line overlapping the second.


Step 7. Add more of your colored paint. (At this point, you should be adding more and more color and less and less white)

Step 8. Paint a fourth line.


Step 9. Add more colored paint.

Step 10. (I guess I don't ahve a picture here) Paint a fifth line

Step 11. Add more colored paint

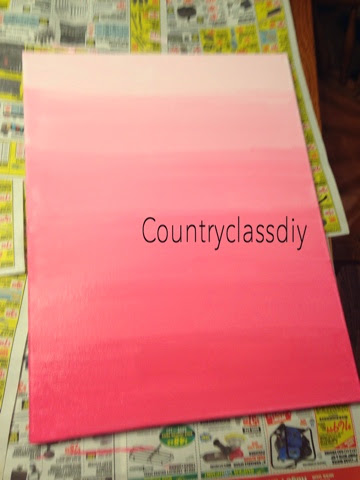
Step 12. Paint your 6th and final line.

At this point, take 5 minutes or so to let your paint dry slightly.


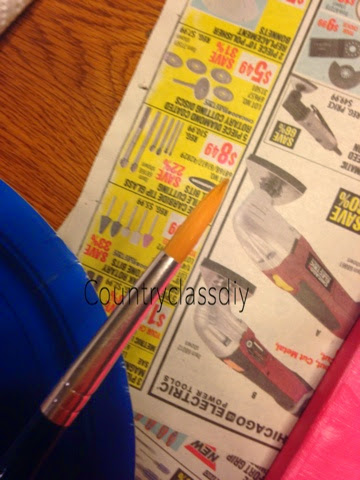
This is the brush I used to paint my sides and my words. This is the biggest brush in the pack.


Step 13. After waiting 5 minutes, mix up a bit more of your darkest color and carefully paint the edges of the canvas.

At this point, your canvas should be dry, so you can start with your words!
 
If you're doing a glitter canvas, make sure to paint your non glitter words first so they have time to dry.
 
Step 14. Paint your words. I did this on both canvases at oce so that my glitter one had time to dry.
 
I free handed my words, but you could print different fonts out if you want.

Step 15. Once your painted words dry, grab your mod podge and clean your paint brush. Paint one letter at a time. I suggest painting a thin coat at first to use as a guide then put your mod podge on thick.
 
Step 16. Pour glitter over your Mod Podge. I pressed down over the letter with the top to make sure the glitter stuck. (Don't use your finger for this. I made that mistake...you know how glitter is)

Repeat steps 15 and 16 for the rest of the word and you end up with this:


At this point, leave the canvas sitting for a good 10 or 15 minutes. Basically, until you feel that the glue is dry enough.

Step 17. Dump your glitter into the trash can.

This is the finished product!


So there you go, two beautiful canvases!
 
 Let me know what you think and hashtag your recreations to #countryclasdiy for a chance to be featured!
 
Find me on Pinterest
 
A quick side note, I took my dog to get spayed on Tuesday and I think It's safe to say she hates me now. I think this picture sums up how she feels about this whole situation. Poor Mollie.