Showing posts with label Canvas. Show all posts

Monday, November 24, 2014

DIY Monkey Canvas

Hello again!
 
I just realized I haven't posted anything since November 4th. Sorry! I'm not dead, just busy with school and preparing for finals next week!
 
I have tons of posts to get caught up on and I've finally started working on the honey one I've been promising you for forever! I would have done that one first, but I just had to post this one because it seems like everyone I know is having babies and this is the perfect personalized baby shower gift!
 
I made this canvas for some of our friends who had a little girl and they absolutely loved it!
 

What you need:
  • Canvas (I used 18x24" from Wal Mart)
  • A sponge brush (I got this one from Michaels)
  • Acrylic paints (I got mine from Wal Mart and Michaels and used: White, Green, a Baby Blue, Brown a Light Pink, Black, and Red)
  • Paint brushes of different sizes (I got mine from Wal Mart)
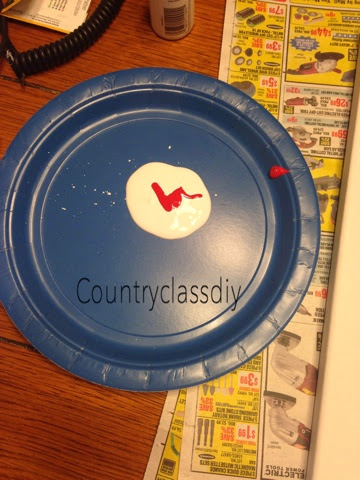
  • A plate for mixing paints
  • Some plain white printer paper
  • Scotch tape (Or you can improvise with duct tape like me)
  • A Pencil


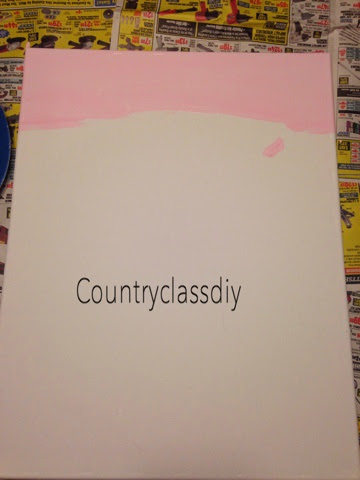
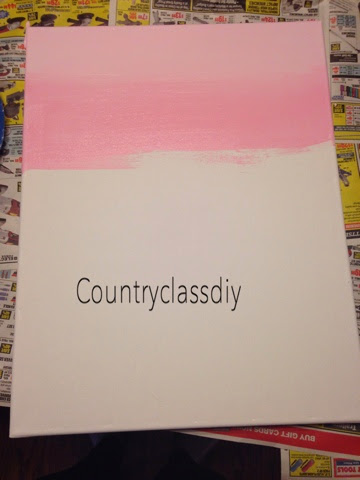
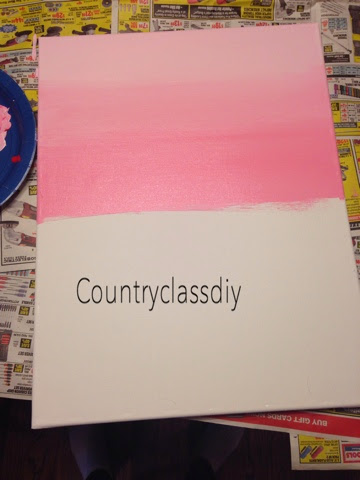
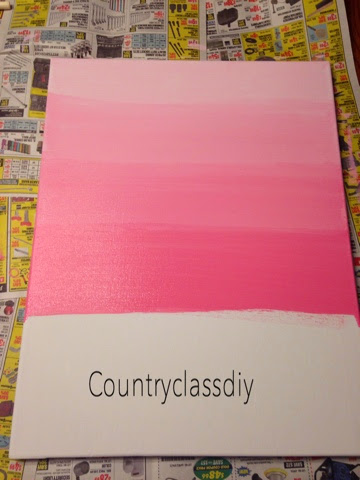
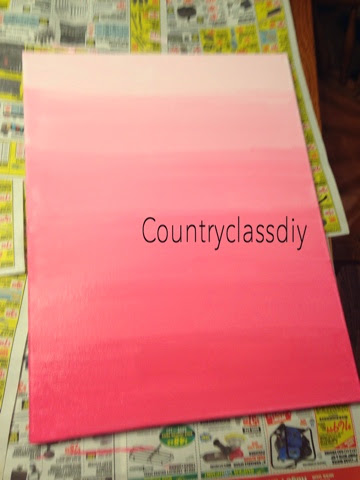
Step 1. Take whichever color you want to use as a background and pain the entire front of the canvas with this. I used my light pink for this step.


Step 2. While waiting for this paint to dry, start sketching out your monkey (Or whatever animal you choose).
 
You can always print something and trace it, I just googled cartoon monkeys and free handed this one.


As you can see, I had to tape two pieces of paper together to finish my monkey, which wasn't a big deal, other than the fact that we had no Scotch tape, so I improvised!


Step 3. Now paint the sides of the canvas with your background color. I find that the easiest way to do this is by lifting it up like I am doing below.


Step 4. Now, paint the general outline of your vine. This doesn't have to be perfect, so don't worry about super clean lines!


Step 5. Take your drawing and scribble all over the back with your pencil, making sure to cover all spots where there are lines drawn.


Step 6. Now, place the back side of your drawing (the one you just scribbled on) onto the canvas however you want to arrange it. With a dull pencil, press down firmly (but not too firmly) and trace over all of the lines.
 
You should have something like this:
(Sorry about the terrible picture, but the lines were so faint it was hard to get a good shot)


Step 7. Now outline all of the darker body parts with your brown, basically, leave out the hands, feet, and facial area.


Step 8. Fill what you just outlined in with a slightly larger brush.


Step 9. Now, mix a couple of drops of white paint in with your brown to create a lighter brown for the hands, feet, stomach, and face.


Step 10. Fill those areas in.
Don't be too worried about the color, though. I honestly hated this color when I was first painting it, but I figured there was no turning back so I left it. I'm actually glad I left it because it looks much better now that it has dried!


Step 11. Mix your pink with a few small drops of red to make the color for the ears.


Step 12. Fill the ears in.


Step 13. Fill your eyes in with white then add the black for the pupil.


Step 14. If you're adding a name, you can either print the letters and transfer them like you did the monkey, or you can freehand them, which is what I chose to do.


Step 15. Fill your letters in and let dry!
 

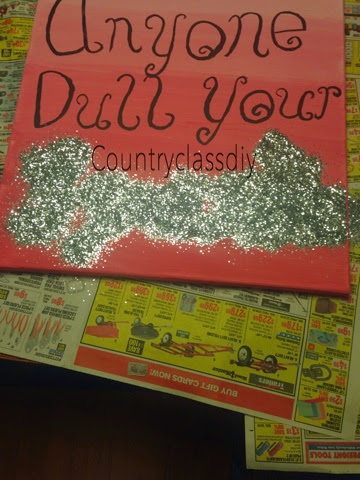
My little sister was hanging out with me when I was painting and she wanted to paint on my drawing of the monkey, so I decided to take some pictures to share with you all!
 
We were both exhausted because I was doing this at 10 at night and didn't finish until like midnight, but we had a great time!
 
If you have kids, this would be a fun thing for them to do while you work on painting the canvas!


Here is her finished product! (She hung it up on the fridge after this for my mom to see in the morning!)


Let me know what you guys think!

Don't forget to post your recreations to #countryclassdiy

Follow me on Tumblr

Shop my avon site: www.youravon.com/dmalloy


Thursday, July 24, 2014

Pink Gradient Canvas

Hello everyone!
 
I'm super excited to share this tutorial with you all because it's so fun and cute! A couple of weeks ago, we celebrated the birthday of one of the girls that works in my office. She's super fun and quirky, so I voolunteered to make some awesome canvases for her! After some recon work and talking with her daughter, we found out that her favorite color is pink, hence the pink gradient! (It looks kind of red in the pictures.) This is a super easy project and probably took me about an hour and a half to two hours to do 2 of them!
 
Here are my finished canvases. You can obviously choose any color and saying you want.


What you need:
  •  Canvas (I always get mine at Walmart because it's the best deal. I used 14x18)
  •  Glitter (I also got this at Walmart)
  •  Paint brushes (have varying sizes on hand)
  •  A large sponge brush
  •  Red acryllic paint (Or a color of your choice)
  •  White acryllic paint (You need this to create the gradient look)
  •  Black acryllic paint (Or whatever color you want your words to be)
  •  Mod Podge (I have the matte kind)
  •  A plate for mixing paint colors
  •  Something to cover your table with (I use newspaper)
  •  
HEre's a close up of the acryllic paint I used

Step 1. Put a large amount of white paint on your plate. Then place a few small drops of your colored paint in the middle. I would do no more than 2. Mix this up with your sponge brush.


Step 2. After the paint is mixed well, paint a thick line across the top of your canvas. I'd tell you how thick, but I'm terrible with measurements, so just eyeball it. It doesn't have to be perfect because you will be blending with other colors. If you are doing 2 canvases, do all of the gradient painting steps at the same time. So once you're done with the light color on one, go right to the other.

As you can see, I accidentally got paint in the wrong spot.

Something else I want to point out, It's okay to get it on the sides, actually, it's better, because then you don't have to worry about any white edges showing. We'll paint the edges later anyways!


Step 3. Now add another drop or two of your colored paint to the white. You might have to add more white as well, and in this case, just add extra color.

Step 4. Paint another thick line with this mixture, slightly overlapping your first line. Remember, it doesn't have to be perfect!

You don't want the part that's overlapping to be a perfectly solid line, you want it to look like it's fading!


Step 5. Add a few more drops of your colored paint and mix (remember, you can always add more white as well).

Step 6. Paint a third line overlapping the second.


Step 7. Add more of your colored paint. (At this point, you should be adding more and more color and less and less white)

Step 8. Paint a fourth line.


Step 9. Add more colored paint.

Step 10. (I guess I don't ahve a picture here) Paint a fifth line

Step 11. Add more colored paint

Step 12. Paint your 6th and final line.

At this point, take 5 minutes or so to let your paint dry slightly.


This is the brush I used to paint my sides and my words. This is the biggest brush in the pack.


Step 13. After waiting 5 minutes, mix up a bit more of your darkest color and carefully paint the edges of the canvas.

At this point, your canvas should be dry, so you can start with your words!
 
If you're doing a glitter canvas, make sure to paint your non glitter words first so they have time to dry.
 
Step 14. Paint your words. I did this on both canvases at oce so that my glitter one had time to dry.
 
I free handed my words, but you could print different fonts out if you want.

Step 15. Once your painted words dry, grab your mod podge and clean your paint brush. Paint one letter at a time. I suggest painting a thin coat at first to use as a guide then put your mod podge on thick.
 
Step 16. Pour glitter over your Mod Podge. I pressed down over the letter with the top to make sure the glitter stuck. (Don't use your finger for this. I made that mistake...you know how glitter is)

Repeat steps 15 and 16 for the rest of the word and you end up with this:


At this point, leave the canvas sitting for a good 10 or 15 minutes. Basically, until you feel that the glue is dry enough.

Step 17. Dump your glitter into the trash can.

This is the finished product!


So there you go, two beautiful canvases!
 
 Let me know what you think and hashtag your recreations to #countryclasdiy for a chance to be featured!
 
Find me on Pinterest
 
A quick side note, I took my dog to get spayed on Tuesday and I think It's safe to say she hates me now. I think this picture sums up how she feels about this whole situation. Poor Mollie.


Wednesday, May 14, 2014

The Failures and the Successes (DIY Mom Canvas)

Hello everyone and happy Hump Day!

I know when I posted my last blog a few days ago I told you that I would soon be posting a tutorial on a nail design with the DIY striping tape...Well, that didn't happen. I attempted to do a cute chevron design on my toes and completely failed...So, I'll keep working on perfecting my use of striping tape, but for now, here is another DIY canvas!

I made this one for my mom, Nancy, to give her mom (my grandma), also Nancy, for Mothers Day and she absolutely loved it! I created this before I created this blog, so I don't have progress pictures, but this is super simple, so hopefully you can all get the hang of it with my completed pictures!!

Tools:
  • Canvas (I used 16x20)
  • Paint brush (Small for details)
  • Large sponge (I got mine from Wal-mart)
  • Paints


Before I start, I just want to give credit to my inspiration for this project. I was browsing pinterest for cute canvas ideas for my grandma and came upon this canvas and my mom and I instantly fell in love! This canvas is no longer available for purchase, but was made by PrairieBoutique on Etsy.


Now, the creation of this simple and sweet canvas!

Step 1: Paint your canvas using your sponge and whatever color paint you chose for the background. I used a beige color. Let the paint dry for a few hours or overnight.

Step 2: Use a ruler or straight edge (I used a piece of paper) to paint the words on in a straight line. I freehanded the words because I felt that it gave the canvas more character, but you can certainly print the letters and transfer them with ink like I did here.

Step 3: If your words aren't showing up too well, simply go over them again.


And ta-da!

I hope you all have a wonderful Wednesday!

Delaina

Find me on Pinterest: pinterest.com/delainalyn
Hashtag recreations to: #countryclassdiy for a chance to be featured on the blog!

Friday, May 9, 2014

Michigan Canvas DIY


I made this canvas at my boyfriend, Tommy's, request (sorry for the poor quality pictures) and am super happy with the results! The above picture is the finished product. Tommy isn't into all of the glitzy stuff, so he just wanted a white background and "John Deere Green" letters. Simple enough! I got my inspiration for a canvas we saw while walking through our local Meijer. Tommy stopped as we were walking and told me he wanted the canvas. One look at the price ($24.99) and I
was shocked. I immediately took a picture (shown below) and told him I could make it. So, I did!


What you need:
  •  Canvas (I bought 16x20 $8 for 2 at Wal-Mart)
  •  Paint (For background and letters 1-2 dollars)
  •  A Printer
  • Scissors
  • Pencils
  • Paint brushes
  • Sponges
Start with a blank canvas. If you want a white background like Tommy did, then you do not have to do the next step. If you want a colored background then use one of your sponges (I got the kinds with the handle at Wal-Mart) and your choice of paint and paint the entire canvas, even the sides. Let it dry for a few hours, or overnight.

Next, get on your computer and go somewhere you can type. I used Microsoft Word. You can choose any font you want for this. I used Arial. You're going to need really big sizes; I didn't use smaller than 72. To get your sizes larger than 72, use the increase size button that is in the fonts area.

You can play around with the font sizes as much as you want. The largest size I used was 120. Print all of the words and cut them out, placing them on your canvas how you want to arrange them.
***Keep in mind that your words will have a little more space when you trace them. You'll see what I mean below***


Once you have all of the words laid out, take them off and tape the phrases together, this just makes it easier to transfer the letters to the canvas. When taping, make sure that you keep the tape off of the backs and fronts of each printed area. Basically, only tape on the white parts.

After you tape the phrases together, turn your first one over and grap a pencil. On the back of the paper, cover the entire phrase with lead from the pencil. It doesn't have to be perfect, just make sure there is lead on the back of each letter.

Next, turn your paper back the correct way and place it how you want it on the canvas. I chose to center all of my words similar to the canvas we saw at Meijer. Once you have the first slip placed how you want it, tape it to the canvas and trace the outline of each of the letters. Do this for every phrase and you will end up with something like this:
***See what I was talking about with the spacing?***


After you have all of your words transferred, grab the paint you want to use for the letters and a small paint brush. I don't have a picture, but mine was for small details. Outline the first letter and then fill it in. Don't worry about being perfect! After filling the first letter in, take one of your sponges and carefully dab at it with the corner, creating a messy look. Do the same thing for the rest of the letters.


This is what mine looked like halfway through:


Then admire your finished product!


Let me know if you have any questions! I'd love to see some of your recreations and twists on this!

Enjoy!

Delaina

Find me on Pinterest: pinterest.com/delainalyn
Hashtag recreations to: #countryclassdiy for a chance to be featured on the blog!